Getting Involved

Find ways to contribute to the library as an employee, graduate student, or volunteer.

Involvement Opportunity Suggestions

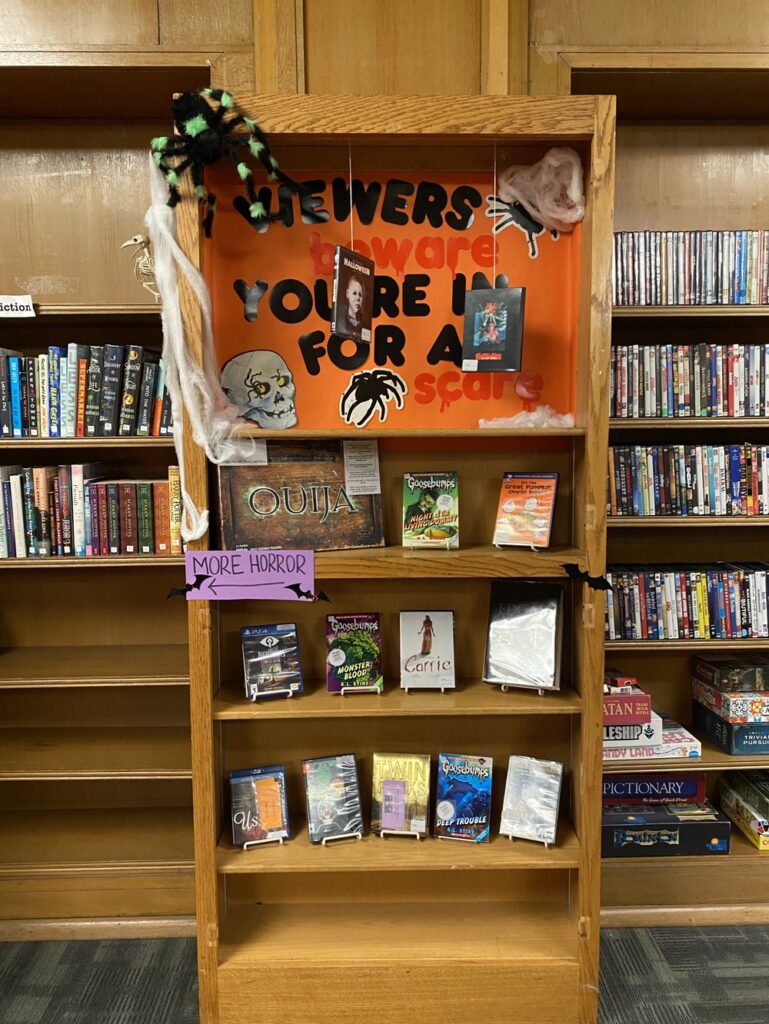
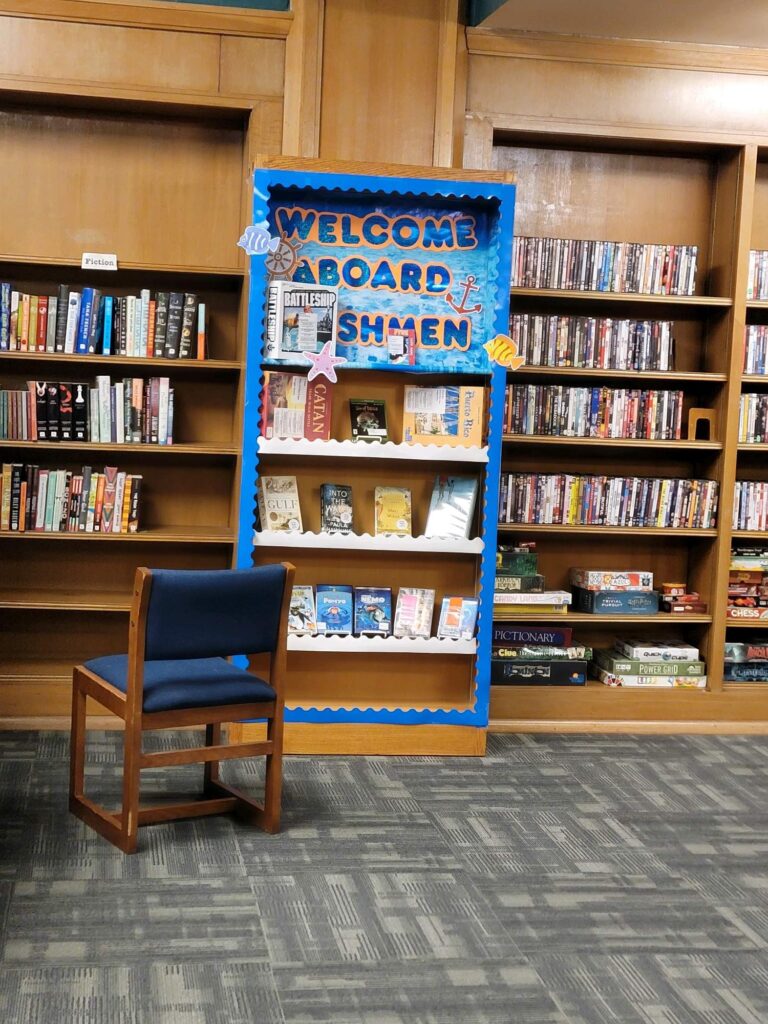
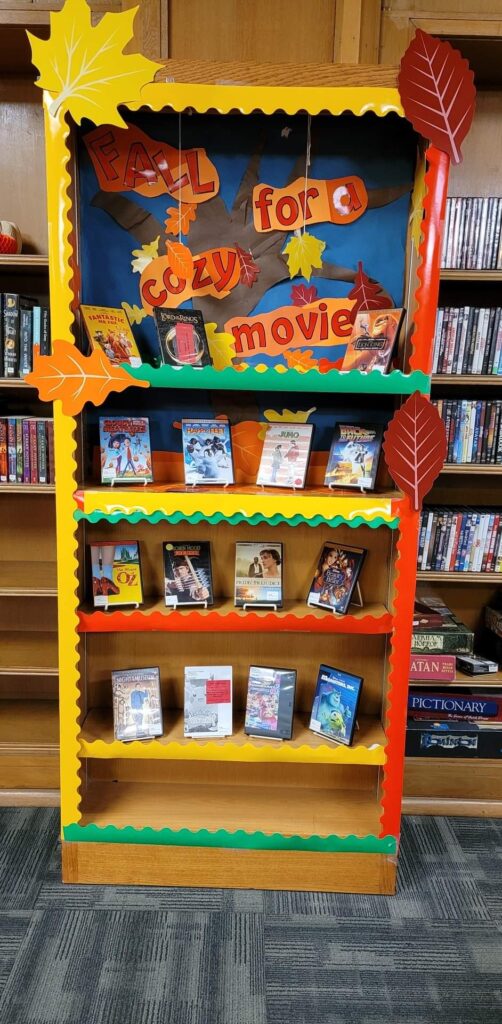
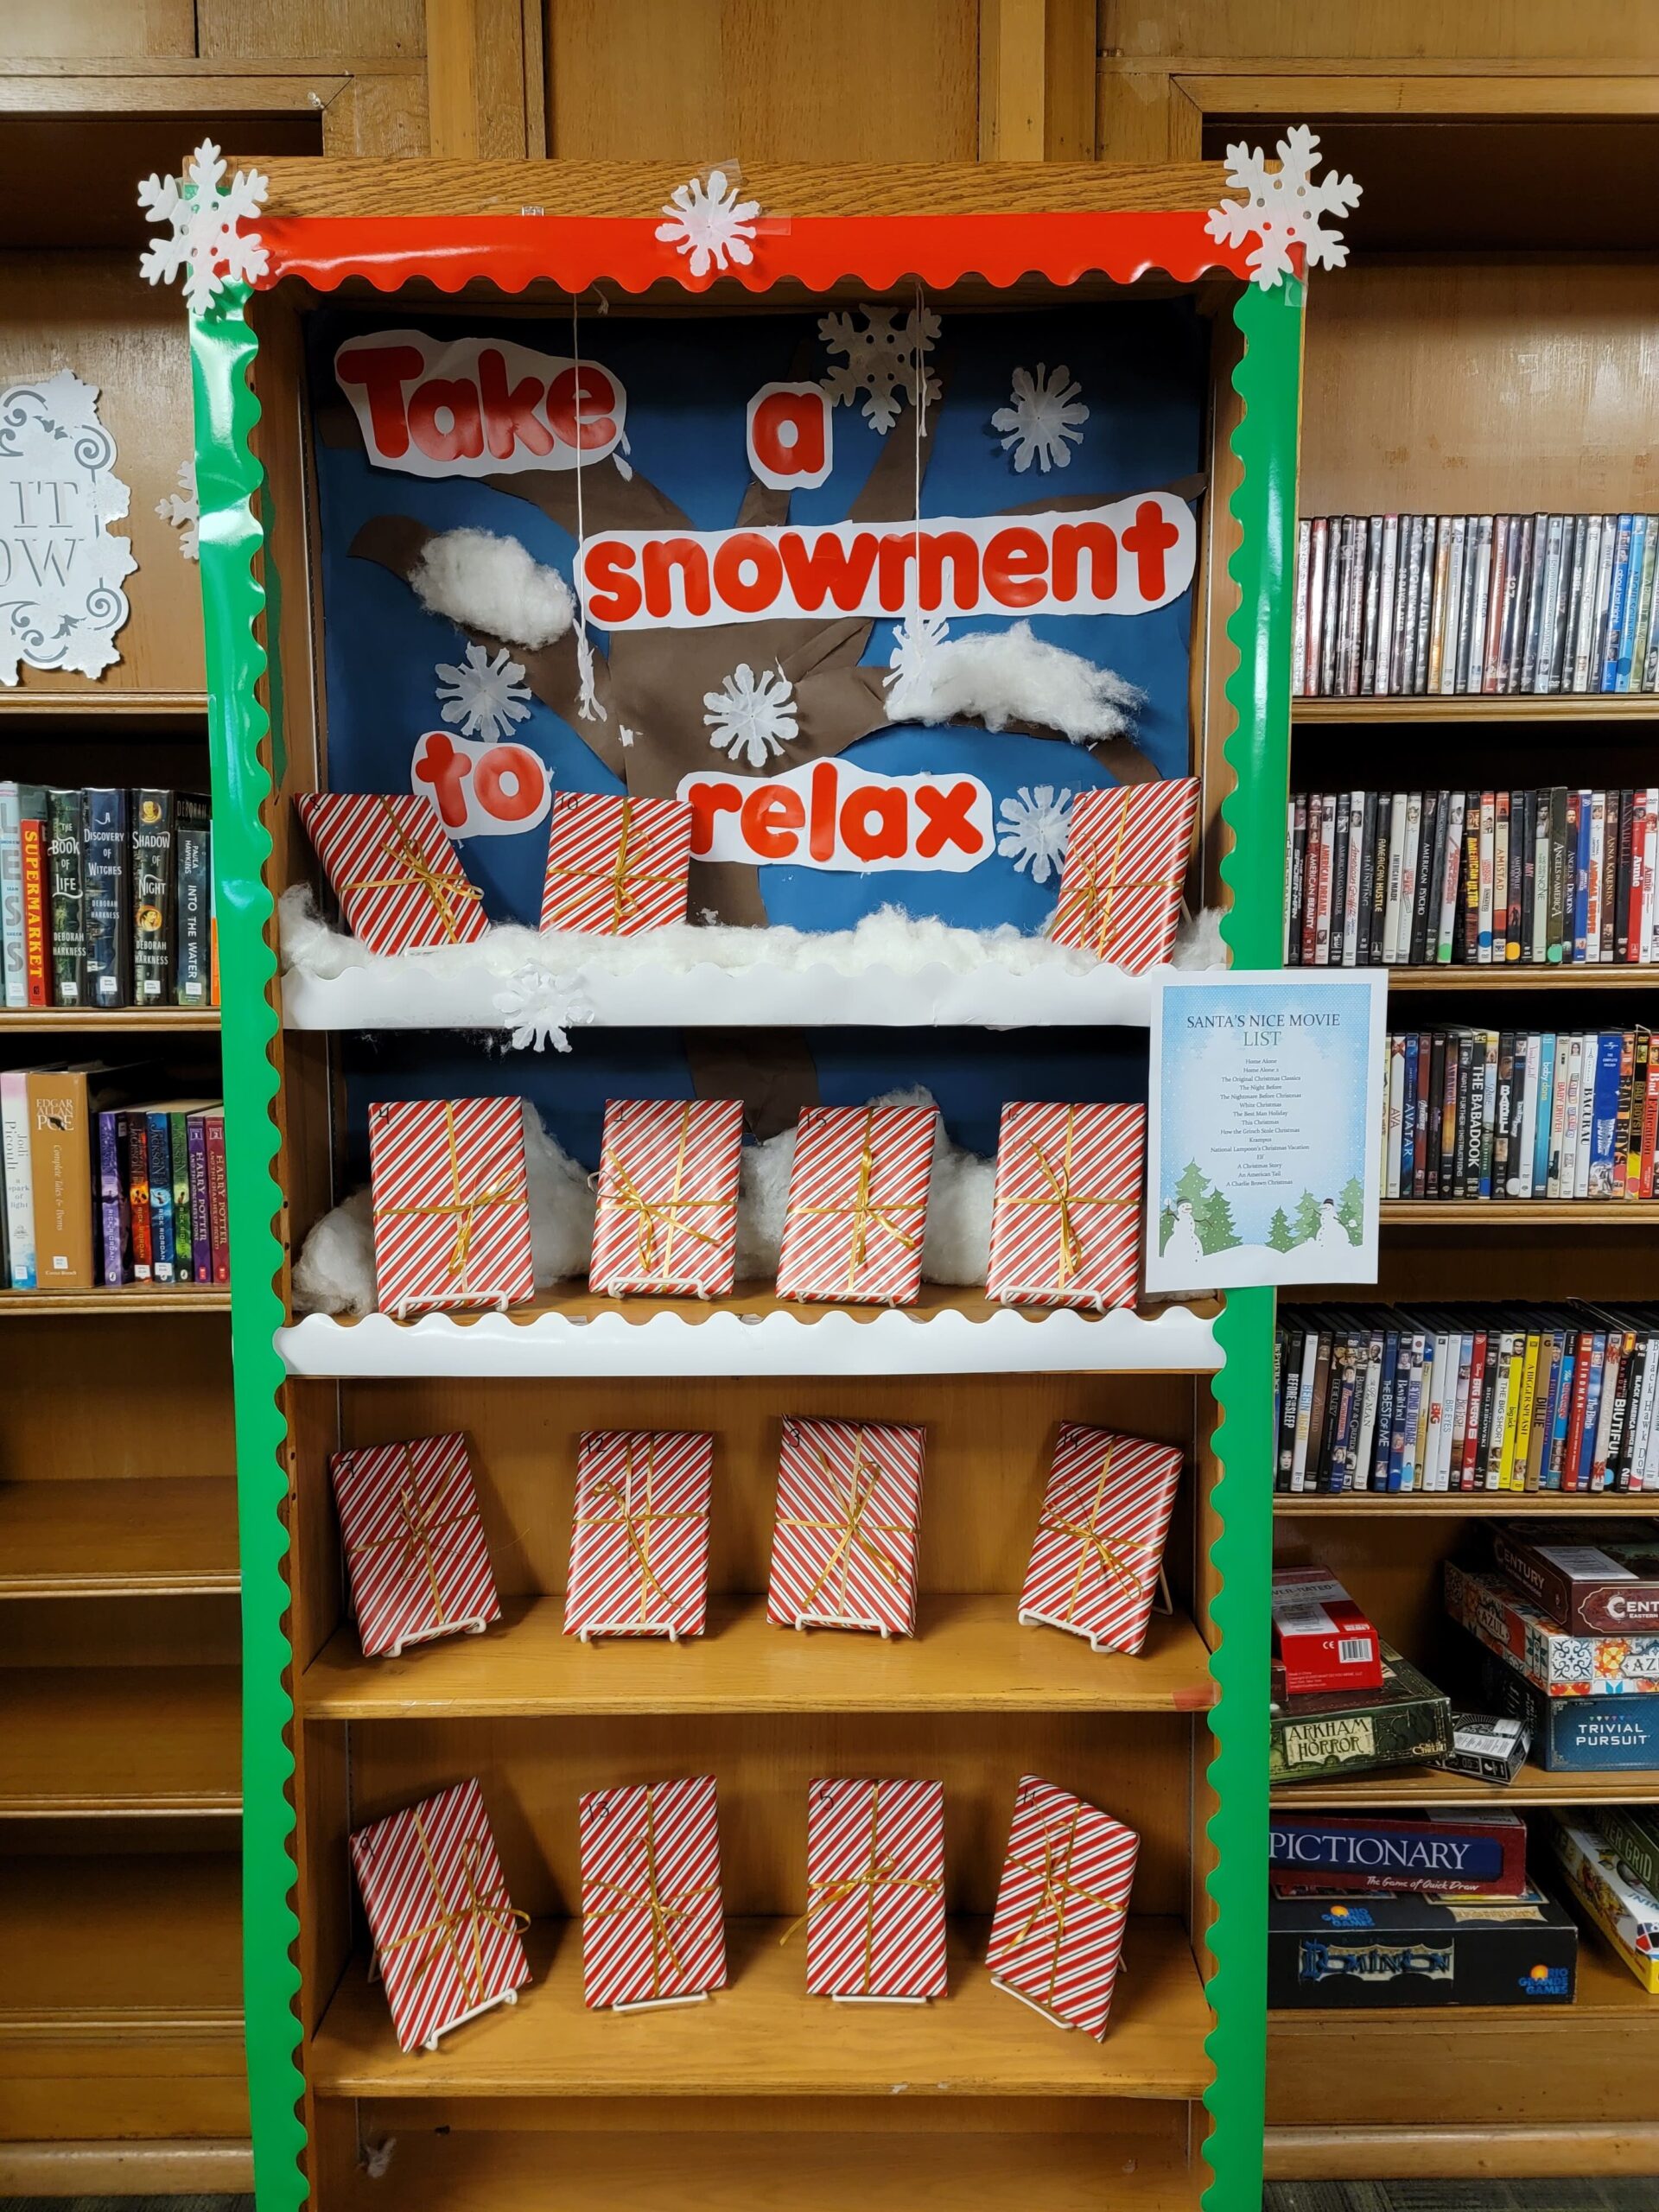
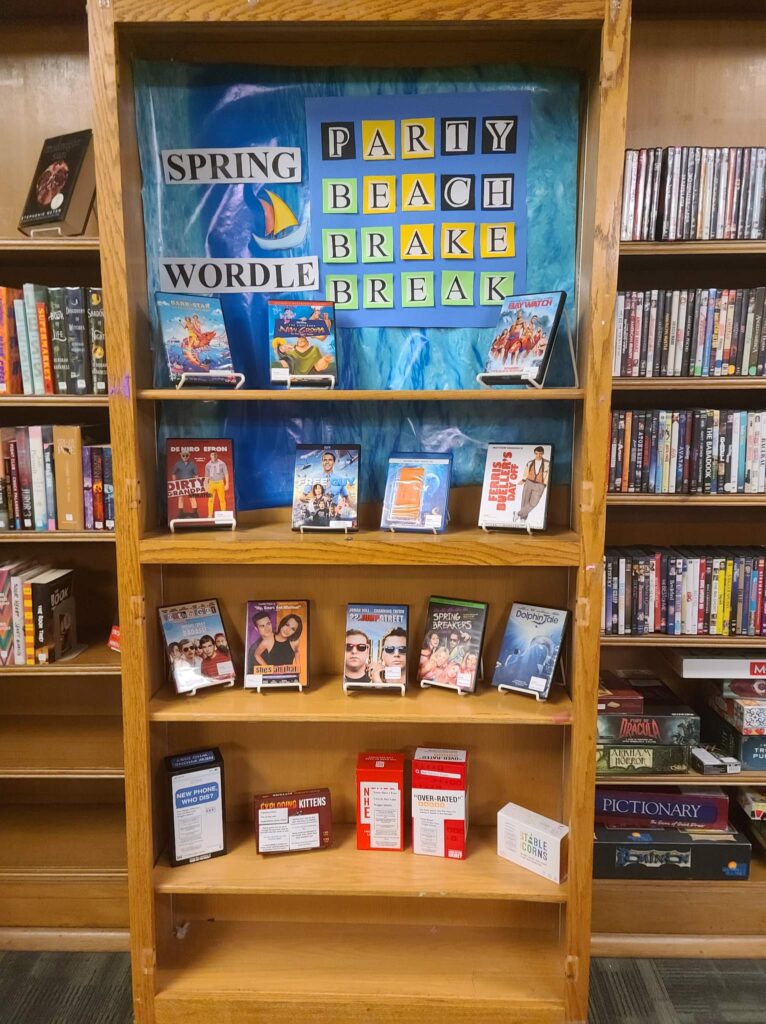
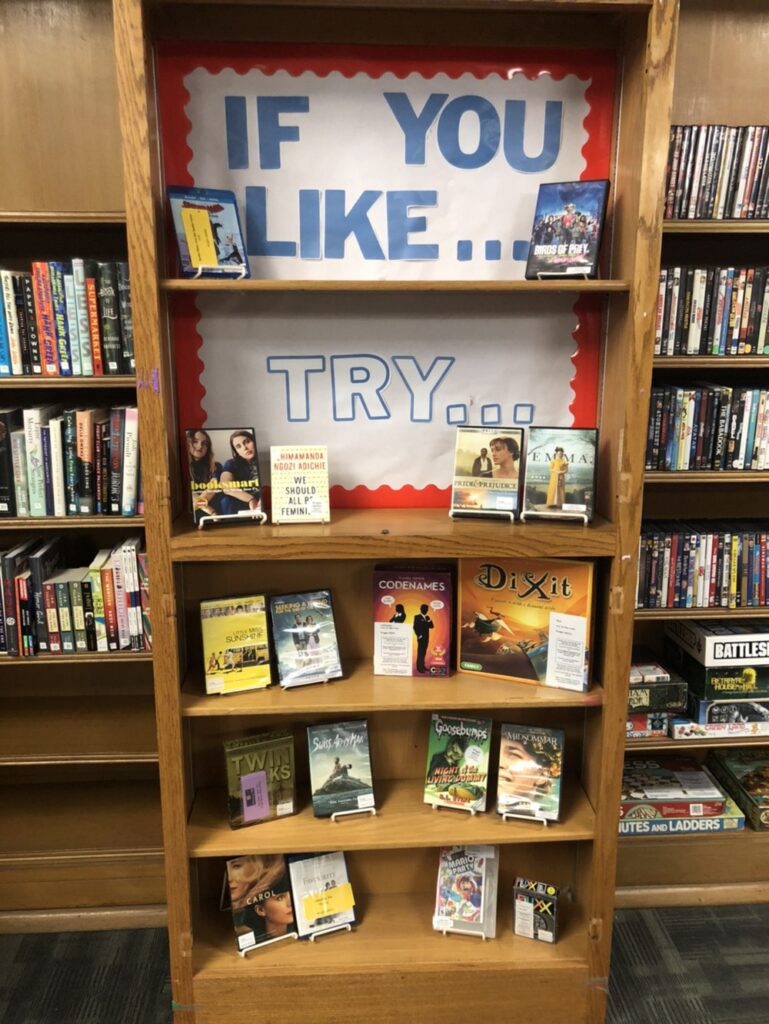
Creating a display is a great way to showcase the libraries collections, encourage library checkouts, and even promote inclusivity and diversity in our collections!

Propose a display theme and item list, design signage and request materials, and create a display for patrons and library employees to enjoy!

Creating a program or event is a great way to generate community engagement and get students involved with the libraries.

Have an idea for the libraries that you want to see happen? Programs and events are a great way to organize the community. Whether they be for destressing, education, or hobbies, they’re a great way to participate in the library.

Have something you want to teach? Create a workshop and invite your peers in person or over zoom to attend your interactive lecture.

Educational programs, career building, or even exploring a hobby. Workshops are a great way to start teaching AND to start learning!

Exploring the archives, special collections, or your own bookshelf: designing an exhibition is an art form for everyone.

Exhibitions, once daunting, are an amazing way to design and extrapolate on your passions, interests, and history. Whether you are interested in ancient manuscripts or the renderings of notable costume designers, exhibitions are one part lesson plan and one part art gallery.

Want to explore the past? The archives are a great way to delve into records keeping, history, and culture.

University archives are an intrinsically familiar way to explore ourselves and the community we are a part of. Foldering, preservation, digitization, or even just creating posts in social media; the archives are an exploratory tool into ourselves.

Creating and maintaining records are a great way to introduce yourself to the functionalities of libraries, archives, museums, and galleries.

Working with metadata provides a way to explore, extrapolate, and improve upon the systems that make libraries equitable and accessible.

Work alongside a librarian as an assistant or mentee and learn about libraries.

It is easy to feel left in the dark and ironically, shadowing is a great way to find the light. Working alongside professionals during their day-to-day can provide invaluable experience and perspective on what it is like to be a librarian.

See something that needs to change and want to help initiate it? Libraries are supposed to be welcoming and accesible for all, and it is up to us to make those changes.

Propose an accessibility or inclusivity policy, program, or update to the facilities. Explore what makes the physical and digital spaces of libraries equitable and how we can improve our institutions facilities.

Building a Library Display

Step-by-Step Guide for Creating Library Displays

1. Planning the Display

  • Choose a Theme: Select a theme that is timely, relevant, and engaging. Examples include seasonal themes, holidays, author birthdays, new arrivals, or special events.
  • Brainstorm Ideas: Think of creative ways to represent the theme visually. Consider the types of materials to include, such as books, DVDs, posters, or objects.

2. Selecting Materials

  • Books and Media: Choose a variety of books, movies, and other media related to the theme. Ensure a mix of genres and formats to appeal to different patrons.
  • Supplementary Materials: Gather related items like brochures, pamphlets, or library guides that patrons can take home.

3. Gathering Supplies

  • Display Props: Collect any props, decorations, or backgrounds that will enhance the visual appeal of the display.
  • Signage: Create or print signs and labels that clearly indicate the theme and provide information about the materials on display.
  • Tools: Ensure you have all necessary tools such as tape, scissors, glue, push pins, and display stands.

4. Designing the Layout

  • Sketch a Plan: Draw a rough sketch of the display layout. Consider the best way to arrange materials and props to create a visually appealing and accessible display.
  • Highlight Key Items: Place the most eye-catching or important items at eye level or in prominent positions.

5. Setting Up the Display

  • Clean the Area: Ensure the display area is clean and free of clutter.
  • Assemble the Display: Arrange the background, props, and materials according to your plan. Make sure items are secure and stable.
  • Add Signage: Place signs and labels in clear view. Include a brief description of the theme and any relevant information or instructions.

6. Final Touches

  • Check for Balance: Ensure the display is visually balanced and items are not overcrowded.
  • Ensure Accessibility: Make sure all items are easily accessible to patrons, with nothing placed too high or too low.

7. Promoting the Display

  • Advertise: Promote the display through the library’s website, social media, and newsletters. Include photos and a description of the theme.
  • Encourage Interaction: Create interactive elements if possible, such as a suggestion box for related themes or a feedback board.

8. Maintaining the Display

  • Regular Checks: Check the display regularly to ensure it remains neat and well-stocked. Replace any missing or damaged items.
  • Update Materials: Refresh the display with new items periodically to keep it interesting and relevant.

9. Evaluating the Display

  • Gather Feedback: Ask patrons and staff for feedback on the display. Note any suggestions for improvement.
  • Assess Popularity: Monitor the circulation of displayed items to assess the display’s impact.

10. Dismantling the Display

  • Remove Materials: Carefully take down the display materials and props. Return books and media to their appropriate locations.
  • Store Supplies: Clean and store props, decorations, and tools for future use.
  • Reflect and Plan: Reflect on what worked well and what could be improved for future displays.

By following these steps, you can create engaging and attractive library displays that capture patrons’ interest and encourage them to explore new materials.

Planning a Program

Step-by-Step Guide for College Students Planning a Library Program

1. Getting Started

  • Setting Goals:
    • Determine what you hope to achieve with the program.
    • Consider the library’s mission and how the program aligns with it.
    • Define the target audience and their needs.
  • Choosing a Theme:
    • Select a relevant, engaging theme that ties into literature, history, or another humanities subject.
    • Review existing ALA themes or develop a new one.
  • Gathering the Books:
    • Estimate the number of books needed based on past program attendance.
    • Collect books from the library collection, other branches, or through interlibrary loan.

2. Creating a Plan

  • Creating a Budget:
    • List all potential expenses including books, scholar honorarium, marketing, and supplies.
    • Determine funding sources and seek financial support if needed.
  • Creating a Timeline:
    • Develop a practical timeline for planning and executing the program.
    • Include key milestones such as securing a scholar, marketing the program, and holding sessions.
  • Assign the Project Director:
    • Designate a project director to oversee the entire program.
    • Delegate tasks to other team members as necessary.

3. Recruiting and Preparing

  • Choosing a Local Scholar:
    • Identify and recruit a local scholar with relevant expertise.
    • Ensure the scholar understands their role and the program format.
  • Recruiting Community Partners:
    • Engage local organizations to support and promote the program.
    • Establish mutually beneficial partnerships.
  • Applying for Humanities Programming Grants:
    • Explore grant opportunities to fund the program.
    • Apply for relevant grants and manage the application process.

4. Implementing the Program

  • Program Format:
    • Each session should be 90-120 minutes long, including opening remarks, group discussions, and closing remarks.
    • Ensure participants have access to reading materials at least one month in advance.
  • Group Size:
    • Decide on the optimal group size for meaningful discussions.
    • For larger groups, consider breaking into smaller discussion groups.
  • Tips for Facilitators:
    • Encourage open dialogue and ensure everyone has a chance to speak.
    • Keep the discussion focused and inclusive.

5. Promotion

  • Getting Started:
    • Start promoting the program two months in advance.
    • Identify target audiences and communication methods.
  • Communication Methods:
    • Use social media, email, flyers, and local media to reach your audience.
    • Engage community partners to help spread the word.
  • Putting It All Together:
    • Combine various promotional methods to maximize reach.
    • Tailor your approach based on the target audience and available resources.

6. Evaluation and Follow-Up

  • Evaluating Your Project:
    • Collect feedback from participants and the scholar after each session.
    • Use evaluation forms to assess the program’s success and gather suggestions for improvement.
  • Supplemental Programming:
    • Consider additional activities like film screenings, author talks, or exhibits to complement the main program.
    • Engage different audience segments through diverse programming options.

By following these steps, college students can successfully plan and execute a library program that engages the community and fosters a love of reading and discussion.

Planning a Workshop

Step-by-Step Guide for Planning and Hosting a Library Workshop

1. Identify Workshop Goals

  • Define Objectives: Clearly outline the goals and learning outcomes of the workshop.

2. Know Your Audience

  • Identify Audience: Determine your target audience, whether they are students, faculty, or community members.

3. Select a Relevant Topic

  • Choose a Theme: Select a theme that is timely, relevant, and engaging.

4. Set a Date and Time

  • Choose Optimal Timing: Pick a date and time that works best for your target audience, avoiding conflicts with major events.

5. Determine Duration

  • Plan Length: Decide on the length of the workshop, typically ranging from one hour to a full day.

6. Prepare a Budget

  • Include Costs: Account for materials, refreshments, speaker fees, marketing, and other essentials.

7. Seek Funding

  • Explore Options: Look for grants, library funds, or sponsorships to support the workshop.

8. Select and Book a Venue

  • Choose Location: Select a suitable space within the library or on campus.
  • Reserve Space: Ensure the venue is booked well in advance.

9. Engage Speakers and Facilitators

  • Invite Experts: Reach out to knowledgeable speakers or facilitators.
  • Confirm Logistics: Communicate all logistical details clearly, including travel and accommodation.

10. Develop Workshop Materials

  • Create Content: Develop handouts, presentations, and other necessary materials.
  • Prepare Kits: If applicable, prepare kits or materials participants will need.

11. Promote the Workshop

  • Marketing: Use the library’s website, social media, newsletters, and flyers to promote the workshop.
  • Registration: Set up an online registration form to keep track of participants.

12. Arrange the Venue

  • Set Up Seating: Ensure seating arrangements are conducive to learning and interaction.
  • Test Equipment: Test all AV equipment, computers, and other necessary technology beforehand.

13. Facilitate the Workshop

  • Welcome Participants: Greet attendees and provide an overview of the workshop objectives.
  • Interactive Sessions: Encourage participation through discussions, Q&A sessions, and hands-on activities.
  • Provide Support: Have staff available to assist with any technical or logistical issues.

14. Collect Feedback

  • Evaluation Forms: Distribute feedback forms to gather participant insights and suggestions.
  • Analyze Feedback: Review feedback to assess the success of the workshop and identify areas for improvement.

15. Follow-Up

  • Share Resources: Send follow-up emails with additional resources or links to workshop materials.
  • Thank Participants: Express gratitude to attendees, speakers, and volunteers.

16. Document and Reflect

  • Record Successes and Challenges: Document what worked well and what could be improved.
  • Plan for Future Workshops: Use this information to improve future workshops and training sessions.

By following these detailed steps, you can ensure a well-organized, engaging, and successful library workshop that meets the needs and interests of your community.

Everything to Know About Exhibitions

Step-by-Step Guide for Creating a Library Exhibition

1. Planning the Exhibition

  • Define the Purpose: Determine the goal of the exhibition. Is it to educate, promote certain collections, or celebrate an event?
  • Choose a Theme: Select a theme that is engaging and relevant to your audience. Examples include historical events, author spotlights, or thematic displays like “Banned Books Week.”

2. Forming a Team

  • Assemble a Team: Gather a group of individuals who will help plan, curate, and set up the exhibition. Include staff, faculty, and possibly students.

3. Creating a Project Plan

  • Develop a Timeline: Create a timeline that includes all steps from planning to evaluation. Allow extra time for unexpected delays.
  • Assign Responsibilities: Clearly define the roles and responsibilities of each team member.

4. Budgeting

  • Establish a Budget: Determine the financial resources required for the exhibition, including materials, marketing, and potential guest speakers or events.
  • Seek Funding: Apply for grants or seek sponsorships if necessary.

5. Selecting Materials

  • Curate Content: Choose items for the exhibition such as books, artifacts, photographs, and digital media that support your theme.
  • Consider Accessibility: Ensure that materials are accessible to all visitors, including those with disabilities.

6. Research and Documentation

  • Conduct Research: Gather information and background details on the items to be displayed.
  • Document Sources: Keep detailed records of sources and create labels and descriptions for the exhibition.

7. Designing the Layout

  • Sketch a Layout: Plan the physical arrangement of the exhibition. Consider flow, visibility, and ease of access.
  • Prepare Digital Components: Design any digital elements or interactive components if applicable.

8. Securing and Handling Items

  • Prepare Items: Ensure that all exhibition items are in good condition. Use facsimiles for fragile items.
  • Transport Safely: Handle all items with care during setup to prevent damage.

9. Setting Up the Exhibition

  • Clean the Space: Ensure the exhibition area is clean and ready for setup.
  • Install Displays: Arrange items according to your layout plan, ensuring they are securely positioned and well-lit.

10. Creating and Placing Signage

  • Design Signs: Create informative signs and labels for each item and overall exhibition theme.
  • Place Signage: Ensure signs are placed at appropriate heights and are easily readable.

11. Marketing and Promotion

  • Develop Marketing Materials: Create flyers, posters, and social media posts to promote the exhibition.
  • Reach Out: Contact local media, community groups, and use library channels to spread the word.

12. Hosting an Opening Event

  • Plan an Event: Organize an opening reception to attract visitors. Include activities like guest speakers, tours, or interactive sessions.
  • Invite Guests: Send invitations to key stakeholders, community members, and patrons.

13. Maintaining the Exhibition

  • Regular Checks: Ensure the exhibition remains tidy and items are in place throughout its duration.
  • Update Content: Refresh or rotate items if the exhibition is long-term.

14. Gathering Feedback

  • Collect Visitor Feedback: Provide a guestbook or digital form for visitors to leave comments and suggestions.
  • Analyze Feedback: Review the feedback to understand the exhibition’s impact and areas for improvement.

15. Evaluating the Exhibition

  • Assess Success: Evaluate the exhibition against your initial goals. Consider visitor numbers, engagement levels, and feedback.
  • Document Learnings: Record what worked well and areas for improvement for future reference.

16. Dismantling the Exhibition

  • Carefully Remove Items: Take down the exhibition with care, ensuring all items are returned or stored properly.
  • Store Documentation: Keep records of the exhibition, including photos and visitor feedback, for archival purposes.

Tips for a Successful Exhibition

  1. Engage the Community: Involve local artists, authors, or community groups to create a more engaging and relevant exhibition.
  2. Interactive Elements: Include interactive components like touchscreens, audio guides, or hands-on activities to enhance visitor engagement.
  3. Clear Signage: Use clear and concise labels and signs to ensure visitors understand the context and significance of each item.
  4. Accessibility: Ensure your exhibition is accessible to all, including clear pathways, large print materials, and multimedia options.
  5. Regular Updates: Keep the exhibition fresh by periodically updating items or themes to maintain visitor interest.

This guide integrates best practices for planning and organizing exhibitions, ensuring a comprehensive approach to creating engaging and educational library displays.

Community Involvement Suggestions for Students

Beginners Guide to Local Involvement and Opportunities

Comprehensive Guide for Volunteering, Practicums, and Internships in Art Galleries, Museums, and Libraries in New York City

Introduction

This guide is designed for students in a collegiate-level Pratt MLIS program and undergraduates interested in gaining experience in art galleries, museums, and libraries. The guide will help you get involved, gain valuable experience, and get your foot in the door in these cultural institutions.

Section 1: Understanding the Opportunities

1.1 Types of Opportunities

  • Volunteering: Offers a flexible commitment and a chance to gain hands-on experience without the pressure of academic credit.
  • Practicums: Typically required for academic credit in MLIS programs, practicums provide structured, supervised experience in a professional setting.
  • Internships: Can be paid or unpaid, offering extensive, project-based experience with the possibility of academic credit.

1.2 Benefits of Each Opportunity

  • Volunteering: Flexible hours, variety of tasks, networking opportunities.
  • Practicums: Academic credit, professional supervision, targeted learning objectives.
  • Internships: Professional experience, potential for paid positions, networking, and career development.

Section 2: Finding Opportunities

2.1 Where to Look

  • LinkedIn: Search for internship and volunteer opportunities. Follow organizations and join relevant groups.
  • Museum Websites: Check the career or volunteer sections of major museums like The Metropolitan Museum of Art, MoMA, and the Brooklyn Museum.
  • Library Websites: Look at the New York Public Library, Brooklyn Public Library, and academic library websites for internship programs.
  • City Government Websites: Explore the NYC Department of Cultural Affairs and NYC Service for opportunities.
  • University Career Centers: Utilize resources at your college’s career center for job postings and career counseling.
  • Professional Organizations: Join the American Library Association (ALA), Art Libraries Society of North America (ARLIS/NA), and other relevant associations.

2.2 Creating a List of Potential Opportunities

  • Compile a list of potential organizations and their contact information.
  • Keep track of application deadlines and requirements.

Section 3: Applying for Opportunities

3.1 Preparing Your Application

  • Resume: Tailor your resume to highlight relevant experience, skills, and education. Include volunteer work, relevant coursework, and any applicable projects.
  • Cover Letter: Write a targeted cover letter for each application. Explain why you are interested in the position and how your skills and experience make you a good fit.
  • References: Prepare a list of professional or academic references who can speak to your qualifications.

3.2 Application Process

  • Research: Learn about the organization and the specific opportunity.
  • Application Submission: Follow the application instructions carefully. Submit all required documents by the deadline.
  • Follow-Up: Send a follow-up email to confirm receipt of your application and express continued interest.

Section 4: Preparing for Interviews

4.1 Interview Preparation

  • Research: Review the organization’s mission, programs, and recent news.
  • Practice: Prepare answers to common interview questions and practice with a friend or career counselor.
  • Portfolio: If applicable, prepare a portfolio of relevant work (e.g., writing samples, project summaries).

4.2 During the Interview

  • Professionalism: Dress appropriately and arrive on time.
  • Communication: Clearly articulate your interest in the position and how your skills and experience align with the role.
  • Questions: Prepare thoughtful questions to ask the interviewer about the organization and the role.

Section 5: Making the Most of Your Experience

5.1 Onboarding

  • Orientation: Attend any orientation sessions offered by the organization.
  • Learning Objectives: Set clear learning objectives with your supervisor.

5.2 Building Relationships

  • Networking: Build relationships with colleagues and supervisors.
  • Mentorship: Seek out mentors who can provide guidance and advice.

5.3 Professional Development

  • Skills Development: Take advantage of any training or professional development opportunities.
  • Feedback: Request regular feedback on your performance and use it to improve.

Section 6: Leveraging Your Experience

6.1 Documenting Your Experience

  • Reflect: Keep a journal of your experiences, challenges, and accomplishments.
  • Portfolio: Add relevant projects and experiences to your professional portfolio.

6.2 Seeking Future Opportunities

  • Stay Connected: Maintain relationships with colleagues and supervisors.
  • References: Ask for letters of recommendation or permission to list them as references.
  • Job Search: Use your experience to apply for future internships, practicums, or job positions. Regularly check job boards and network with professionals in the field.

Section 7: Tips for Success

7.1 Tips for Applying

  • Tailor Applications: Customize each application to the specific opportunity.
  • Follow Instructions: Carefully follow all application instructions and submit all required documents.
  • Stay Organized: Keep track of application deadlines and follow up with organizations.

7.2 Tips for Gaining Experience

  • Be Proactive: Take initiative and seek out additional responsibilities.
  • Stay Engaged: Show enthusiasm and a willingness to learn.
  • Seek Feedback: Regularly ask for feedback and use it to improve your performance.

7.3 Tips for Networking

  • Attend Events: Participate in professional events, workshops, and conferences.
  • Join Organizations: Become a member of professional associations and engage in their activities.
  • Utilize Social Media: Use LinkedIn and other platforms to connect with professionals and join relevant groups.

Conclusion

Gaining experience through volunteering, practicums, and internships in art galleries, museums, and libraries in New York City can be an enriching and career-advancing endeavor. By following this comprehensive guide, students can effectively find, apply for, and make the most of these opportunities, setting a solid foundation for their professional futures.